VISIT PRODI ART UNITED STATES!
We have partnerships with printers in different regions of the world (Europe, UK, USA, Australia), please select your region:
Easily insert your Prodi Art gallery into your website.
The integration is done simply by adding in your site HTML/Javascript code provided by Prodi Art.
Without having to create an account on Prodi Art, test the insertion in your site with a demo gallery.
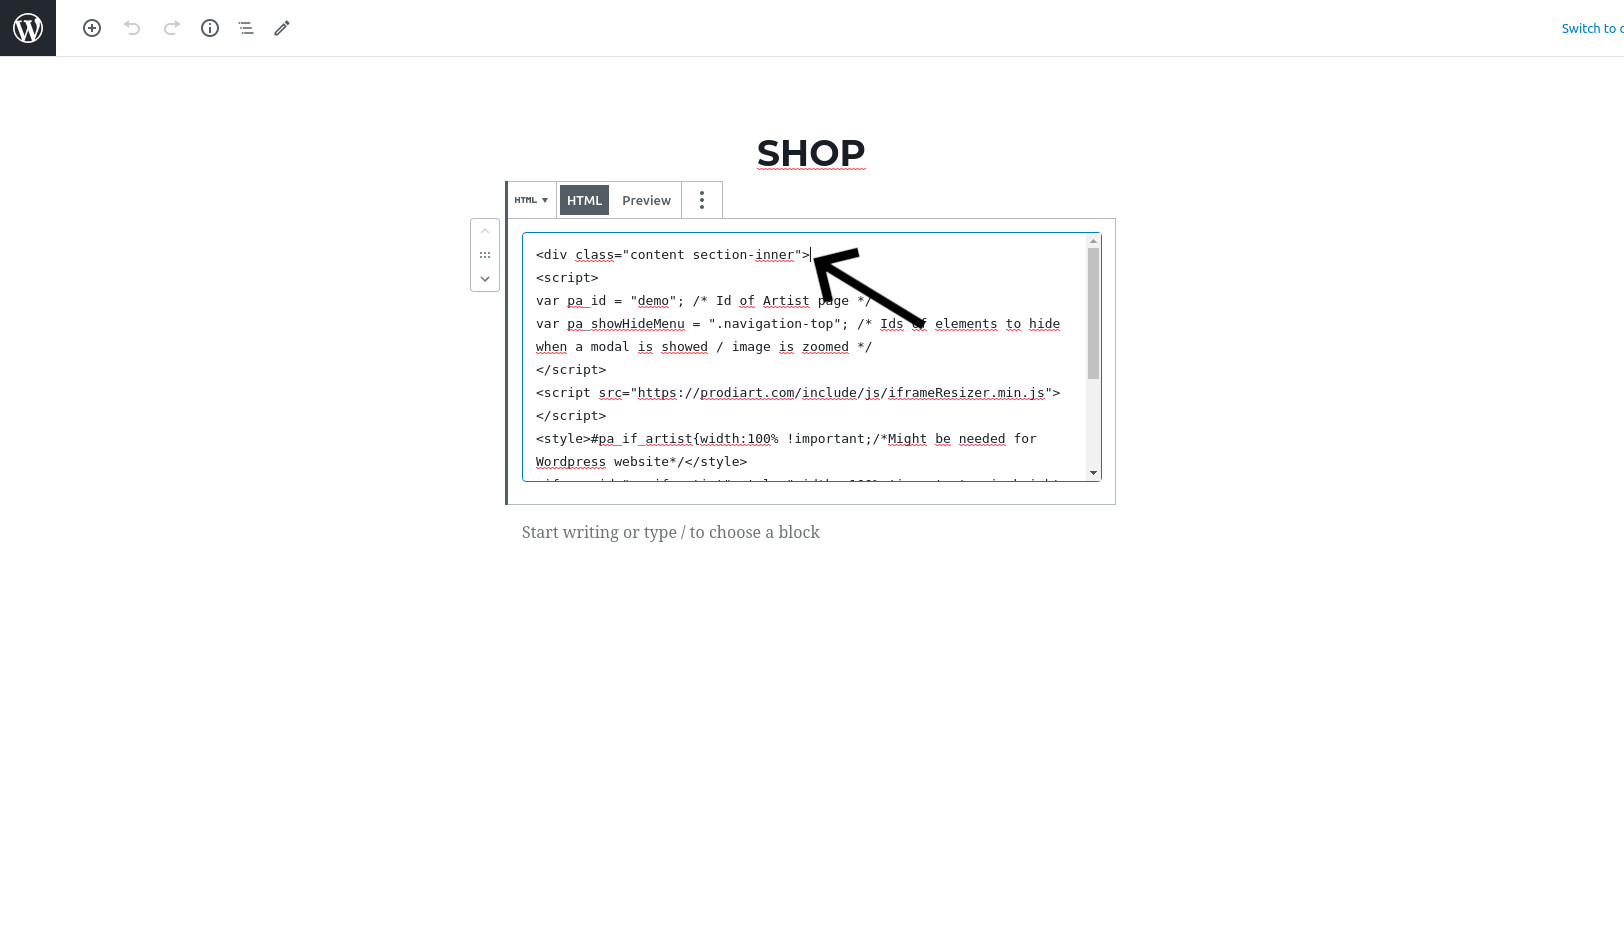
Create a test page and insert in this page the HTML/Javascript code below :
For this example, version 5 of Wordpress was used with its default theme: https://demo-wp.prodiart.com/

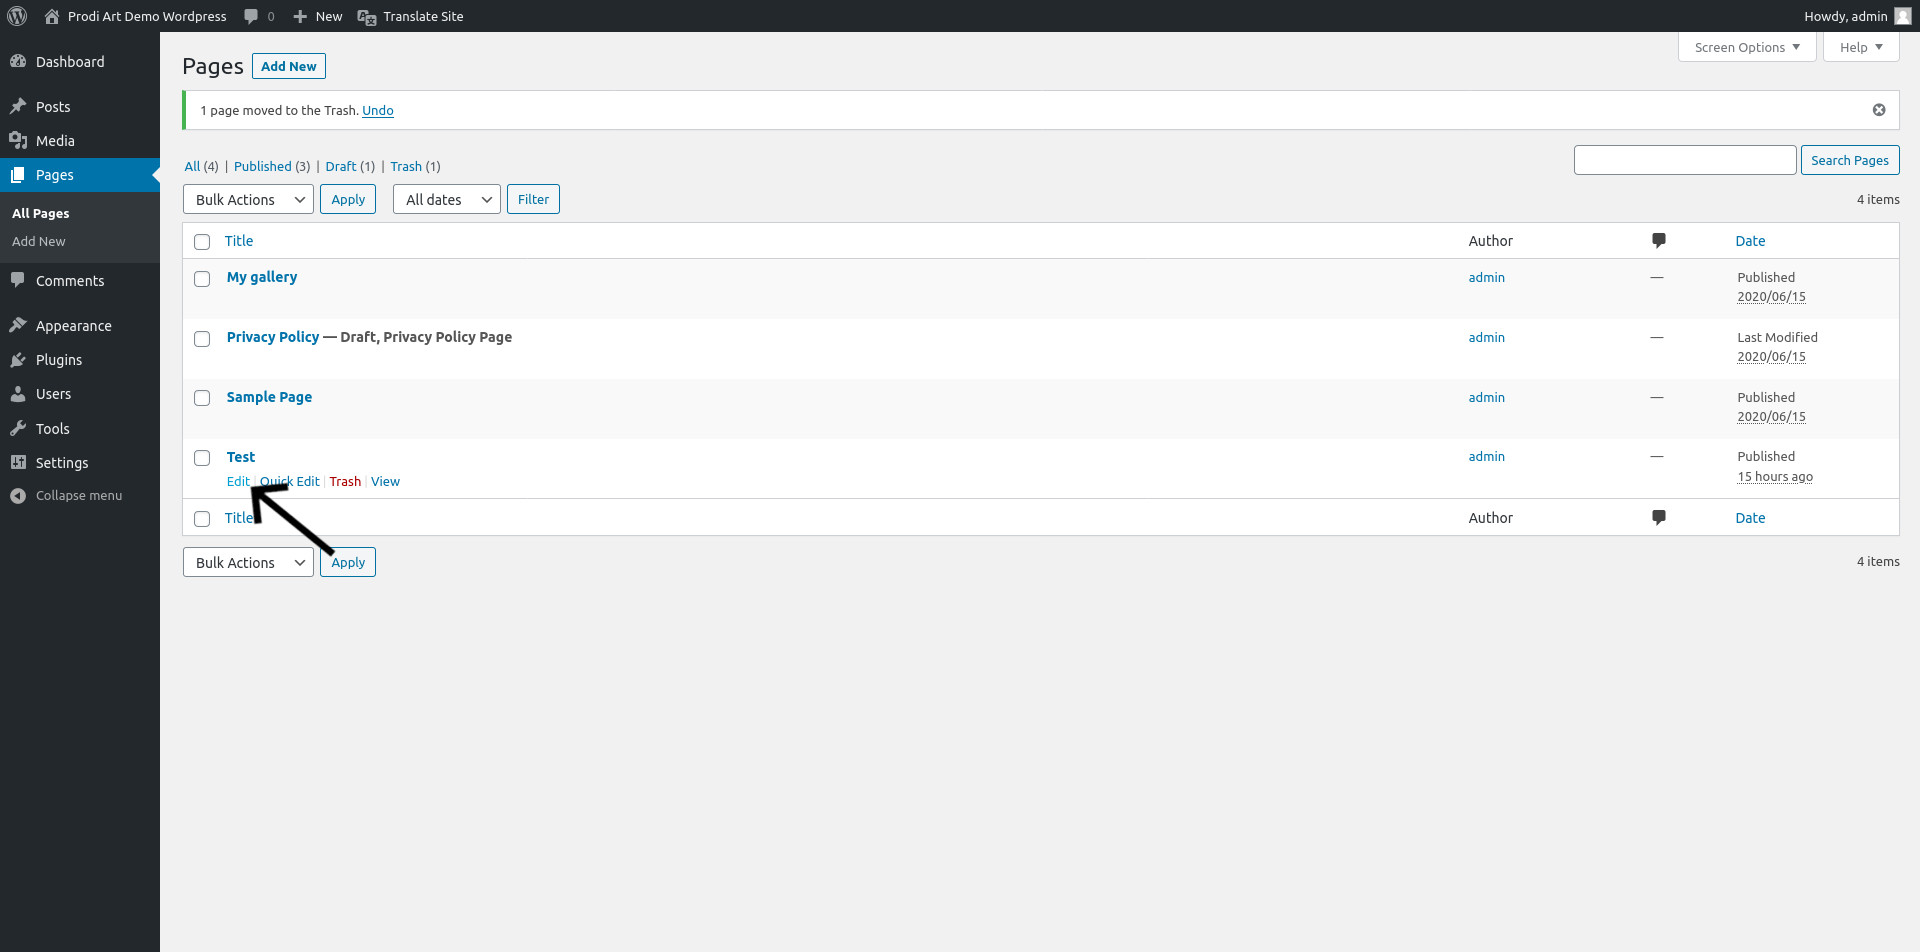
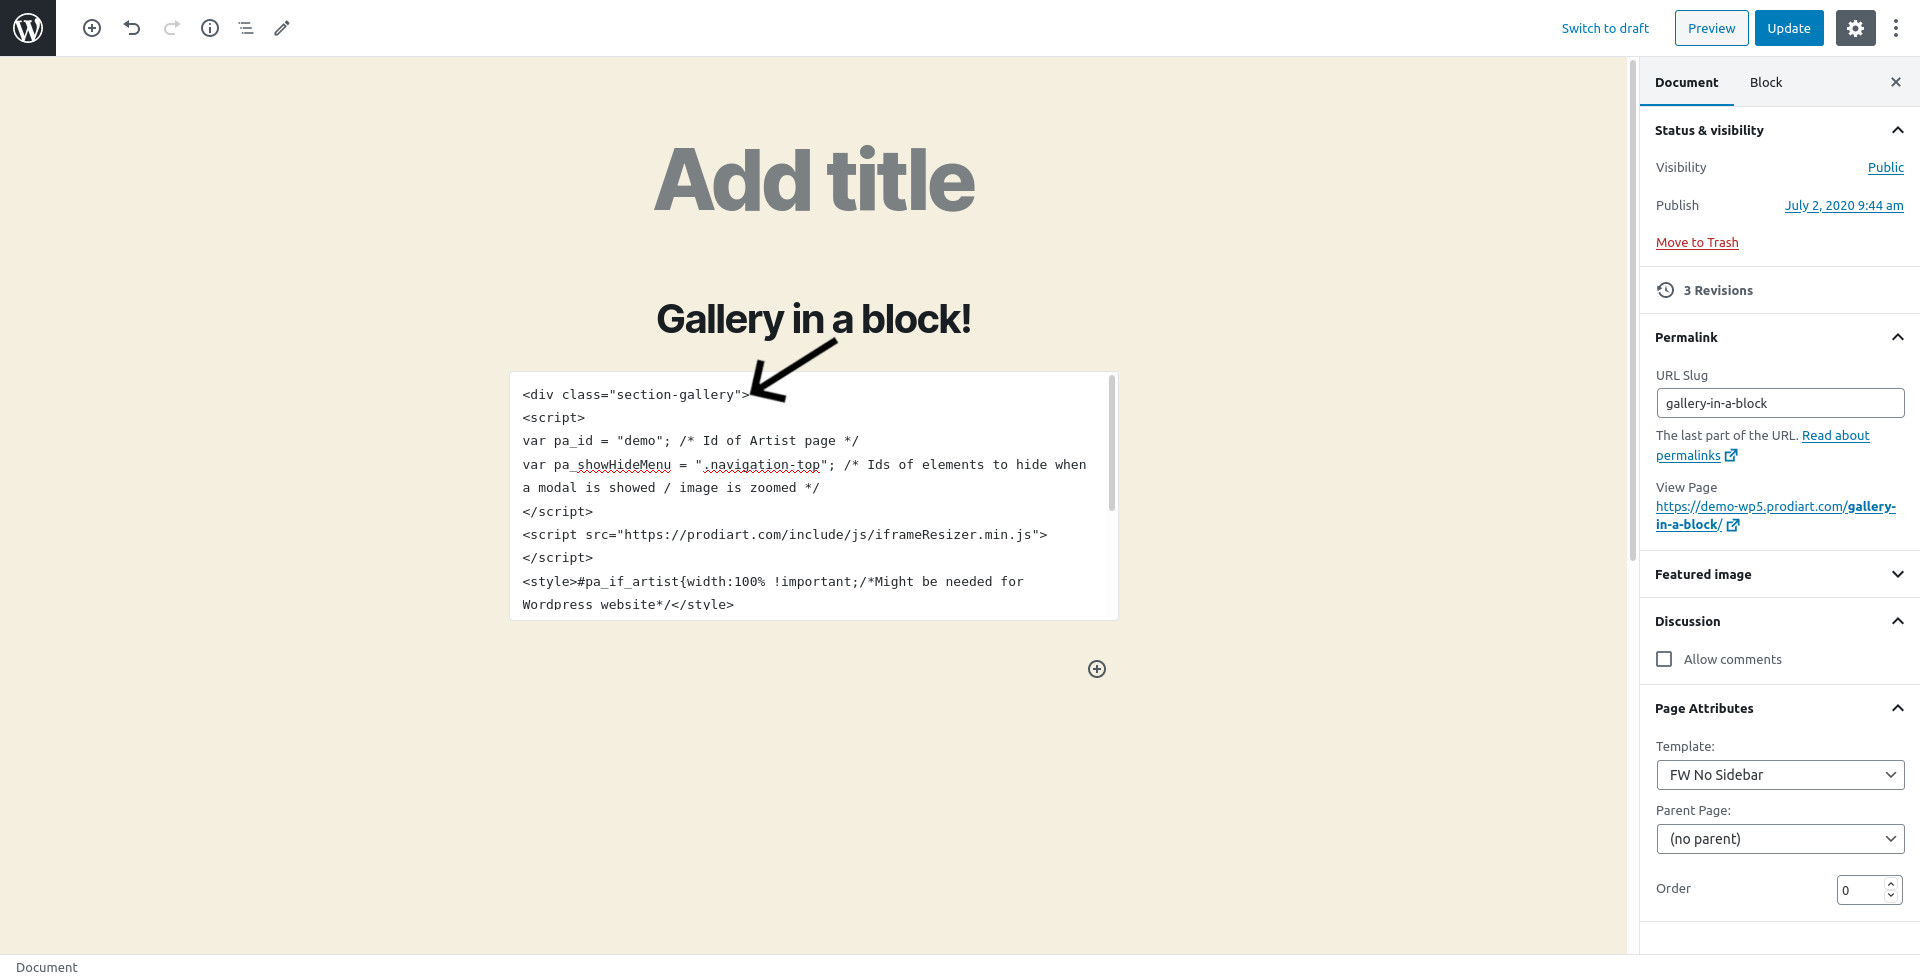
Click on the and search for "html" to select a "custom HTML" block.
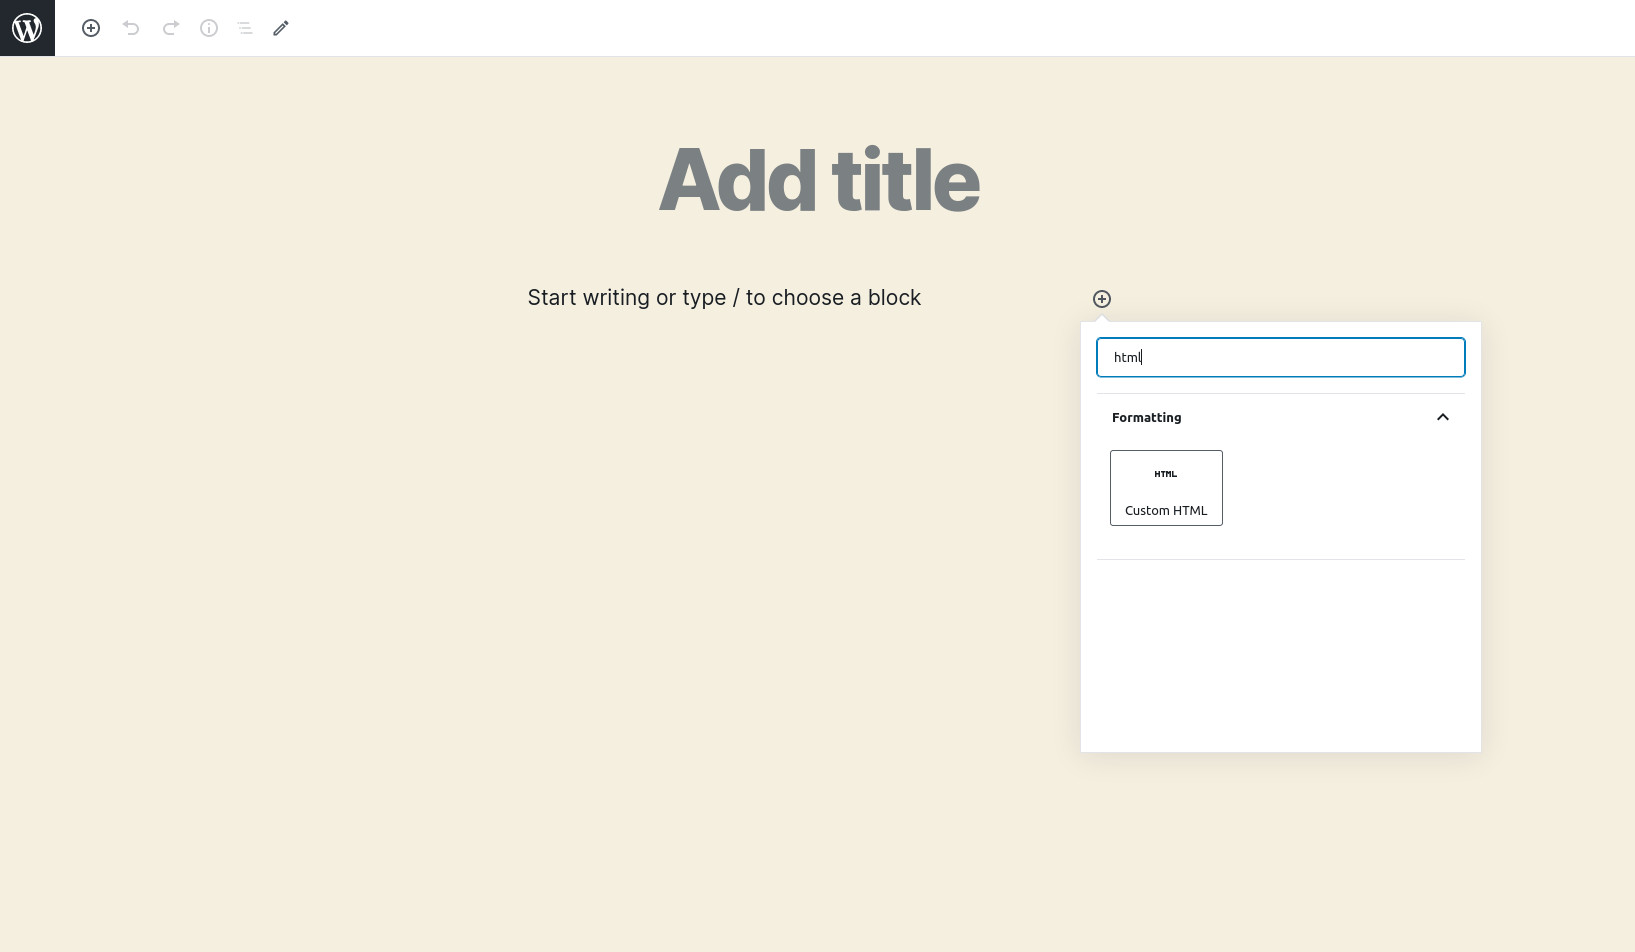
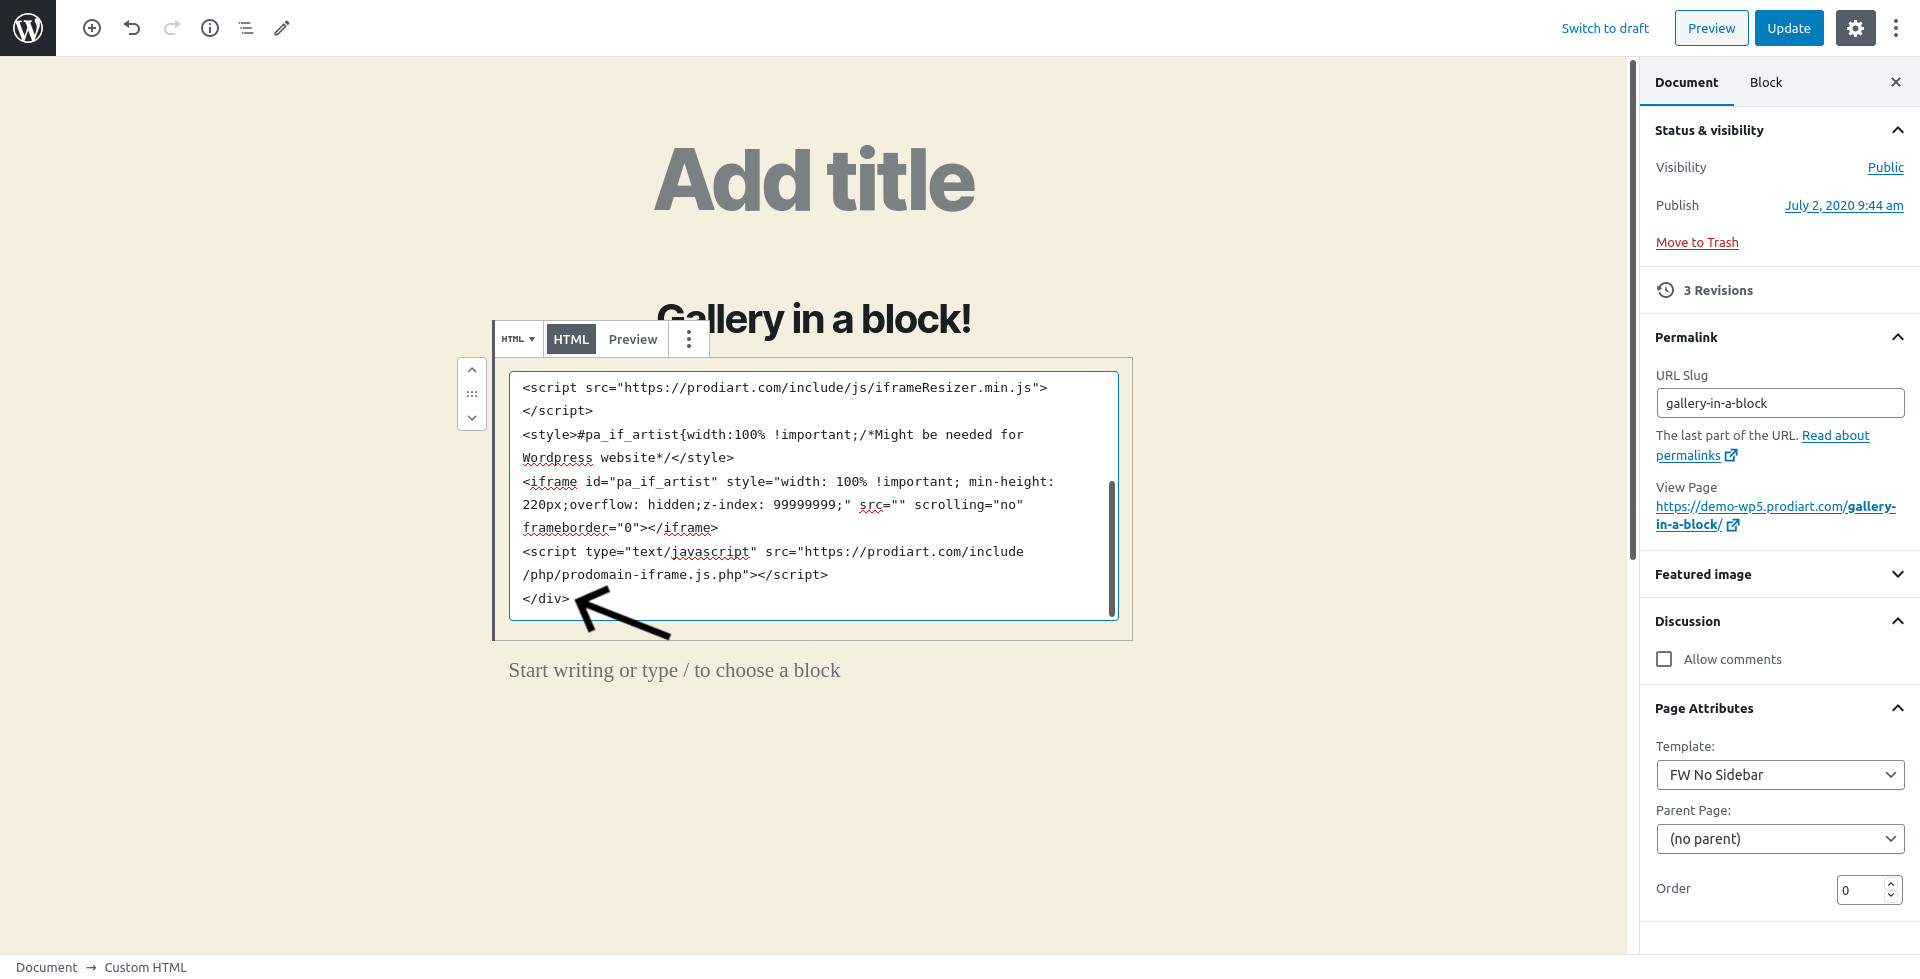
Insert in this HTML block the code provided above. Then save this page. You can leave the title blank and display the gallery at the top of the page.

By default a new page created with Wordpress will not extend over the entire width of the screen: https://demo-wp.prodiart.com/en/test-no-fullwidth/
You need to extend the page display. This can be done by inserting CSS in Wordpres or by using a Wordpress Plugin such as "Fullwidth Templates for Any Theme & Page Builder".

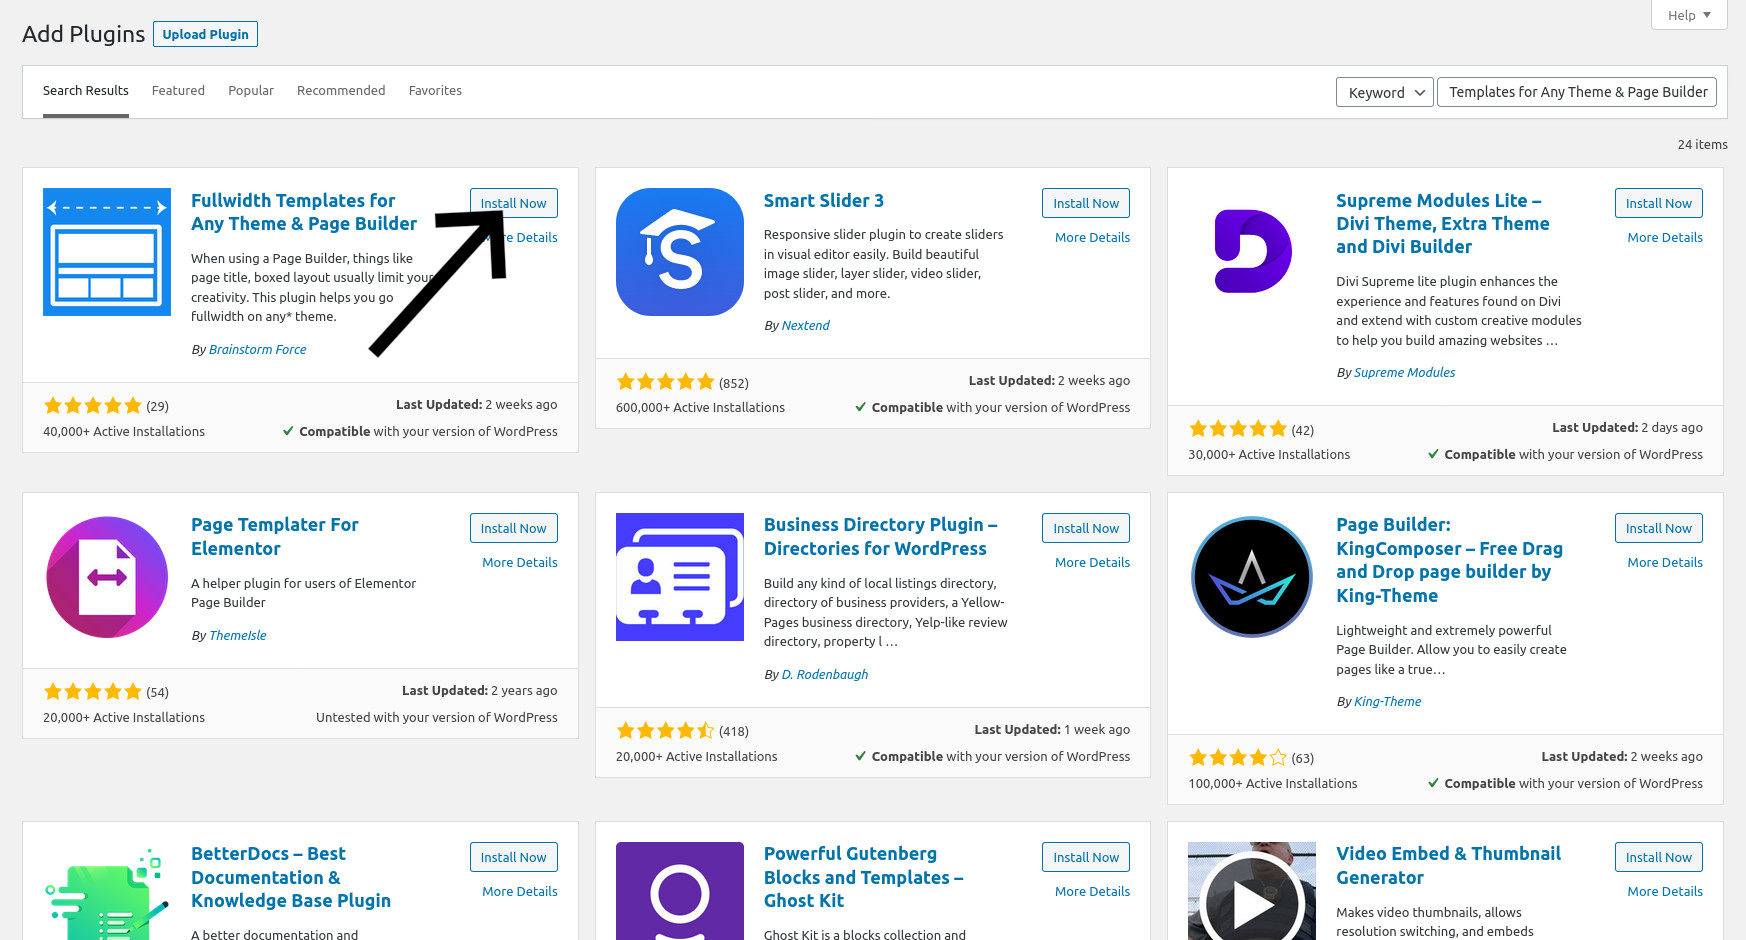
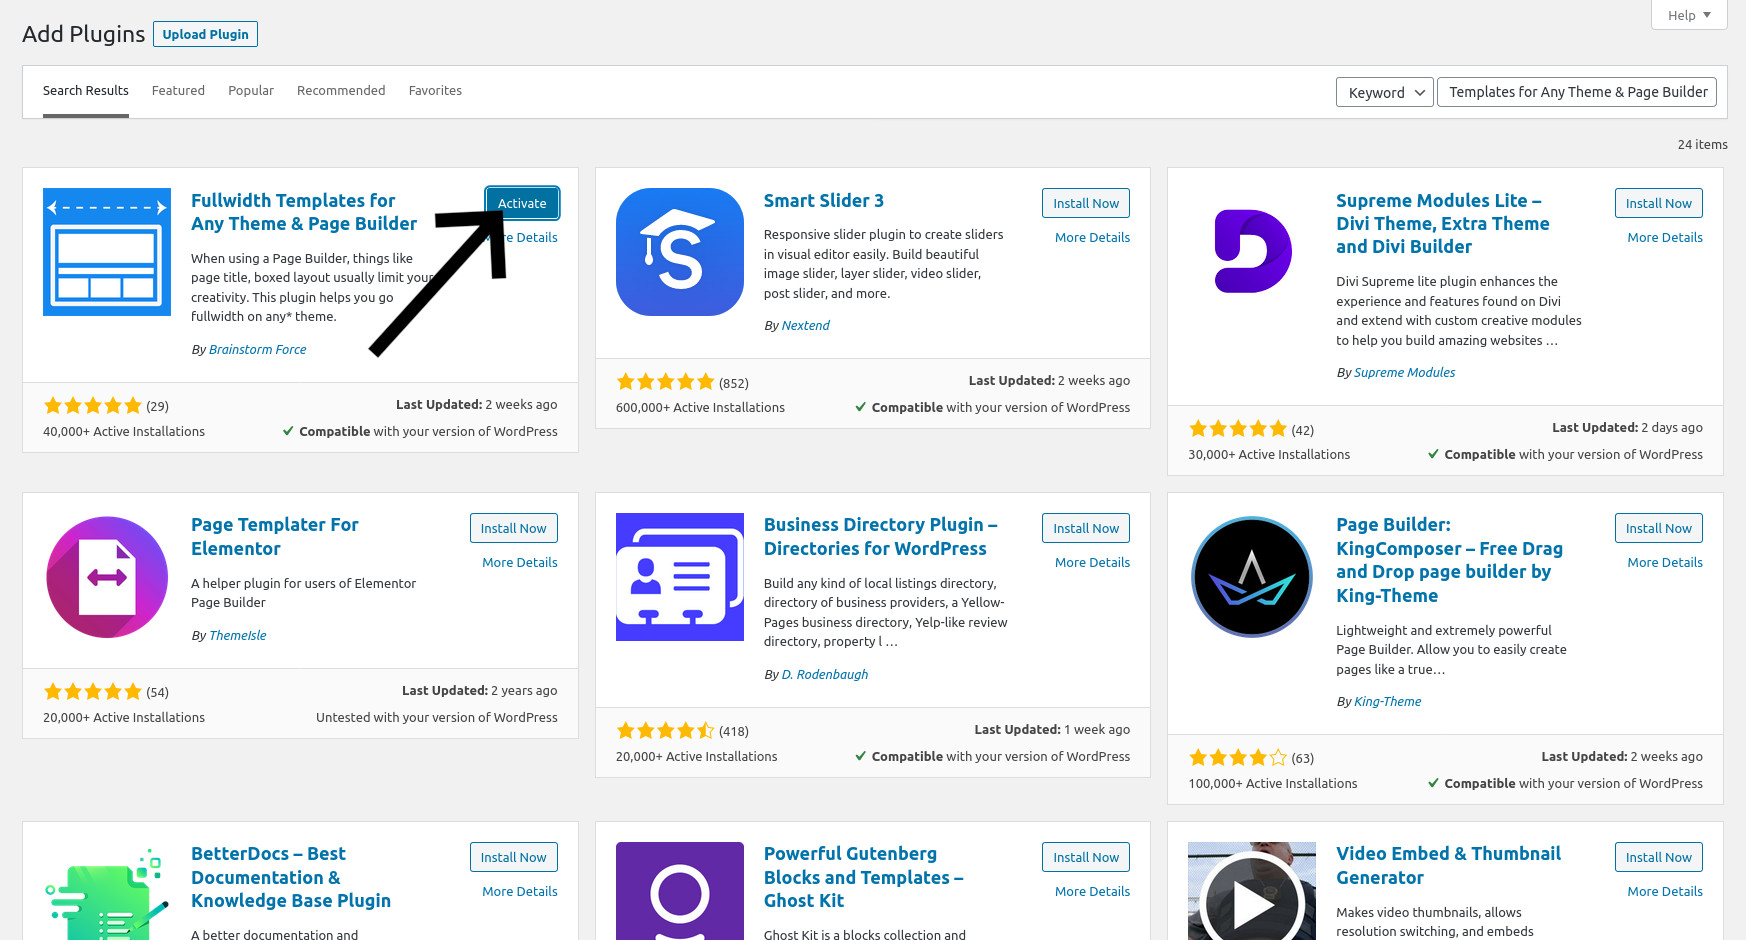
To use this Plugin in the gallery page, you need to activate the FW Fullwidth Template:

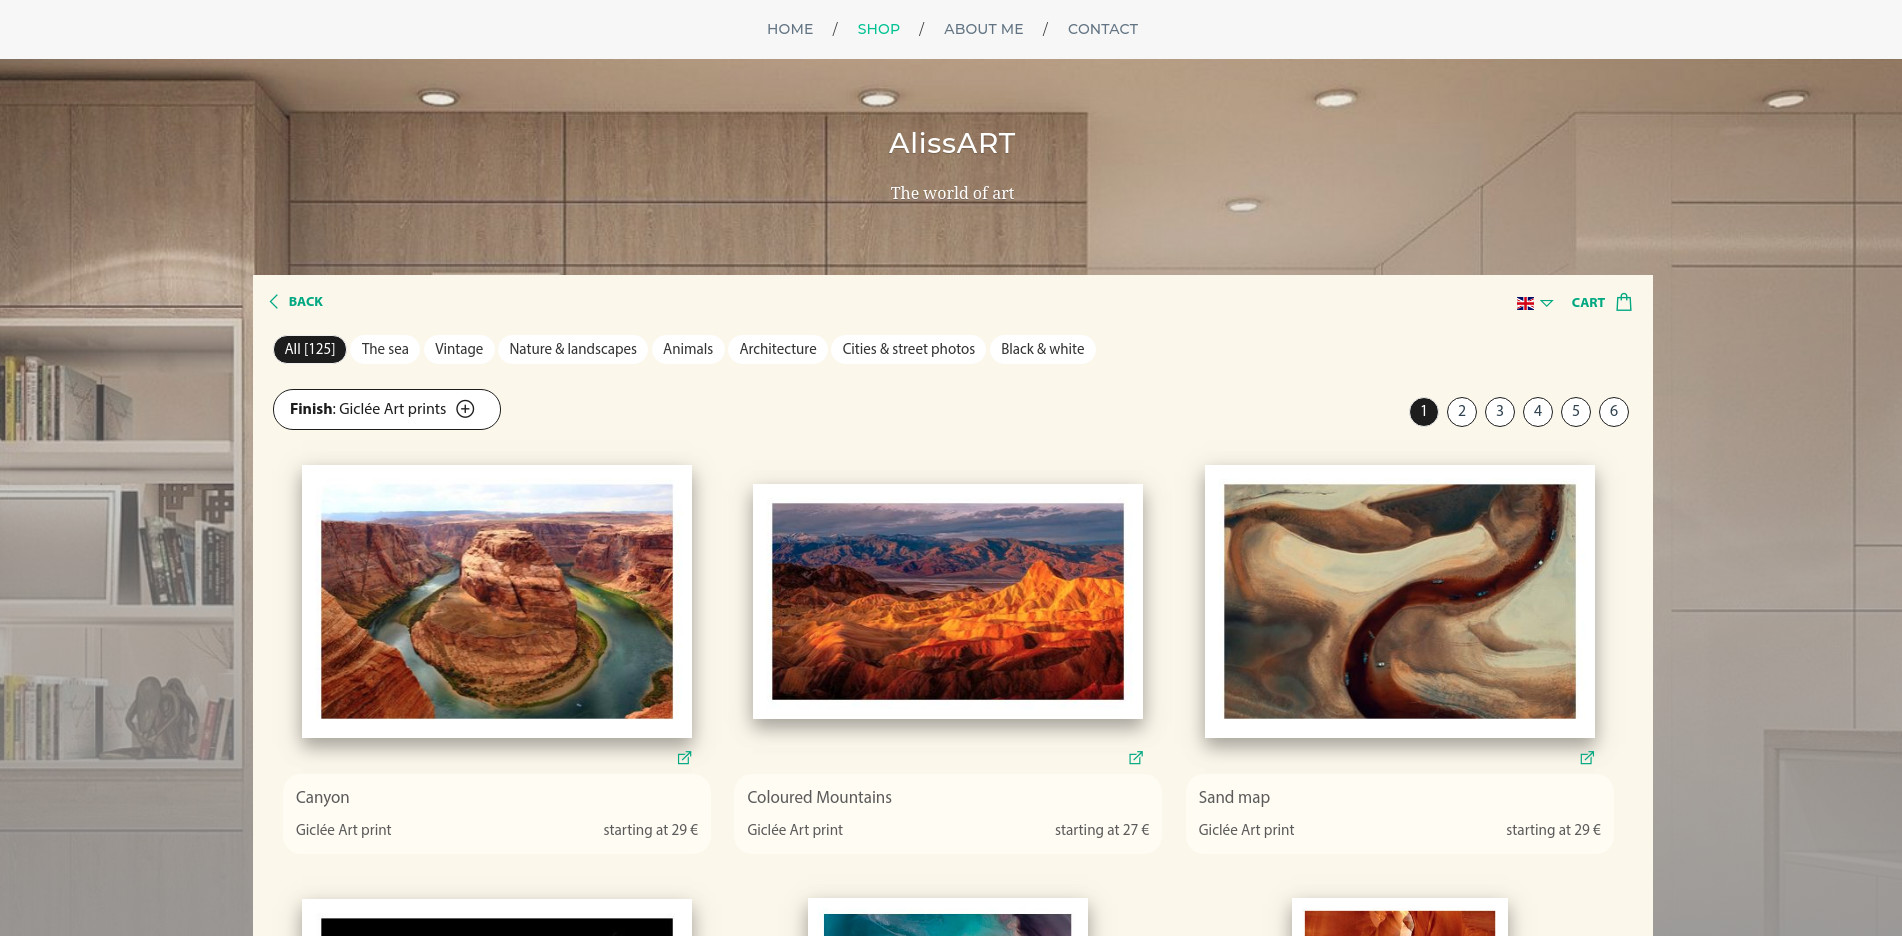
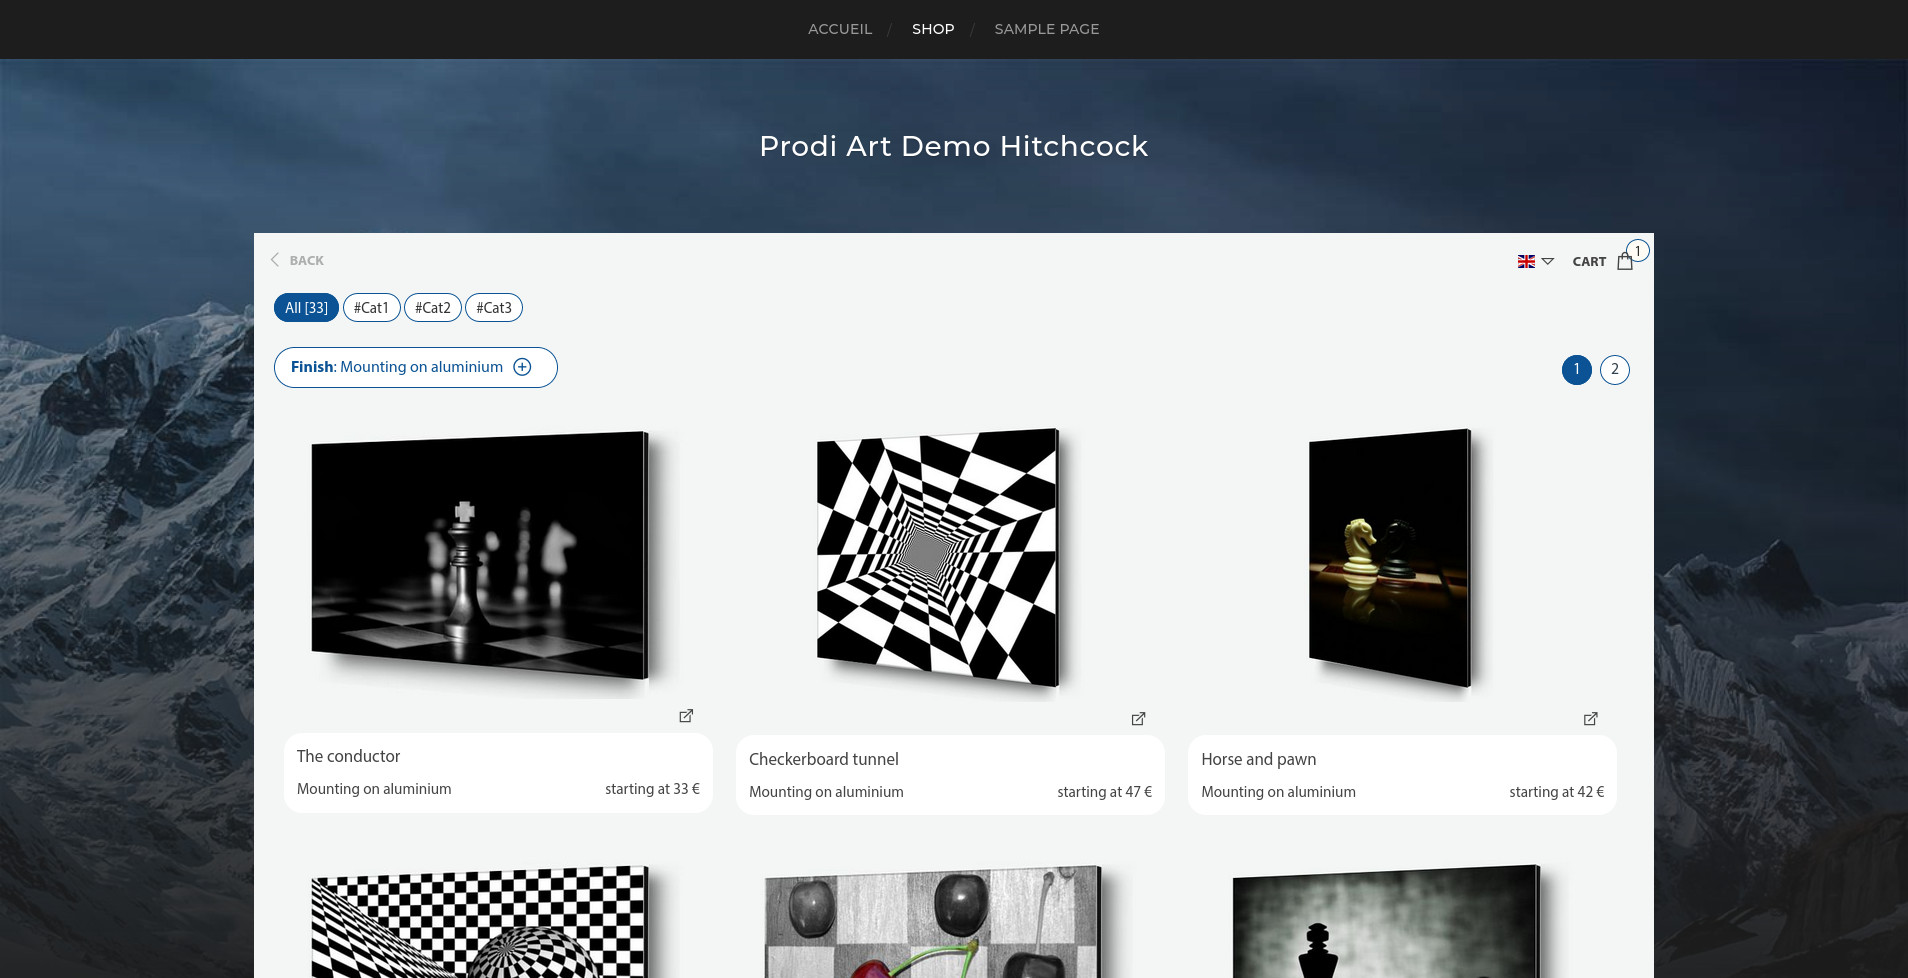
The gallery now takes up the entire width of the screen: https://demo-wp.prodiart.com/en/test-fullwidth/.
With this plugin enabled, the title no longer appears, you can for example add a block above the gallery block to display a title.
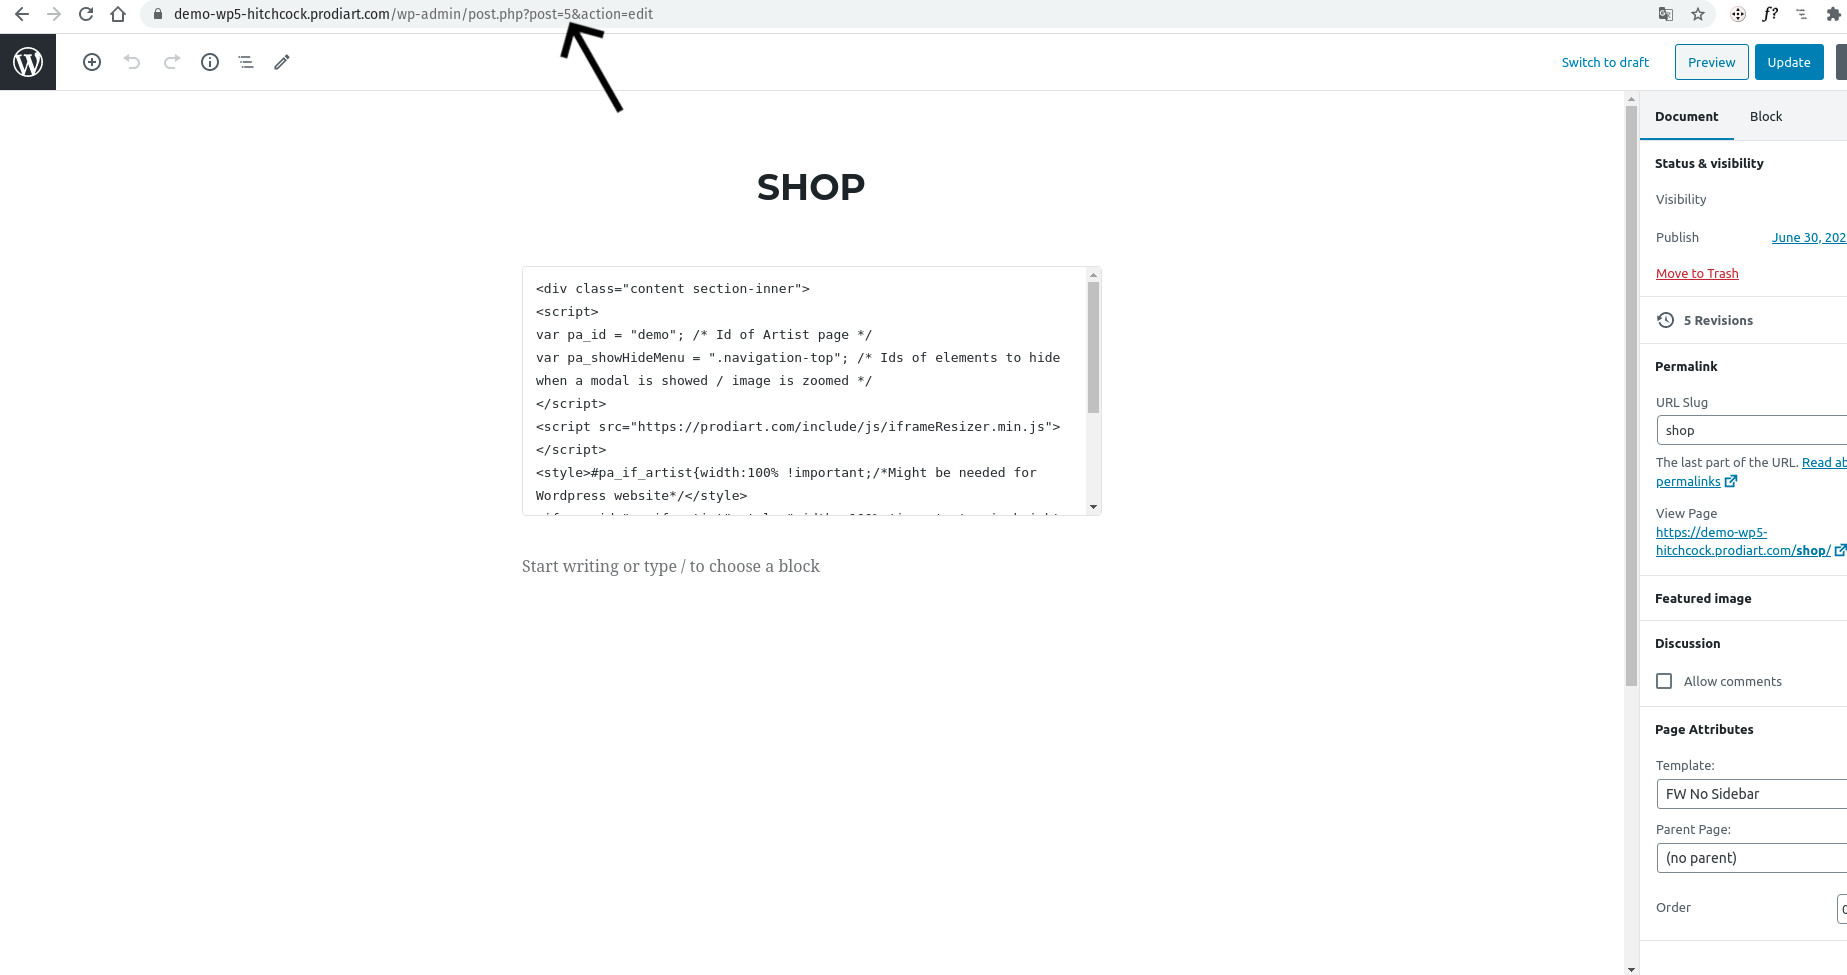
By directly adding the gallery HTML code into your page, a Wordpress theme like Hitchcock can position your gallery behind another element. In this case, it is behind the header image, and you can see that the bottom of the gallery:
In this particular case, you have to add the gallery code between these 2 HTML lines:

The gallery is now visible and takes the whole width of the screen thanks to the "Fullwidth Templates for Any Theme & Page Builder" plugin:
For wide screens, you can put the gallery in a block in the middle of the screen and thus display the background of the site or its color.
This layout must be done with CSS code and may depend on the Wordpress theme you are using. To insert CSS code in your Wordpress site, you can use the Simple CSS extension that you must install and activate. Once installed, this extension will be available from the Wordpress menu Appearance -> Simple CSS.
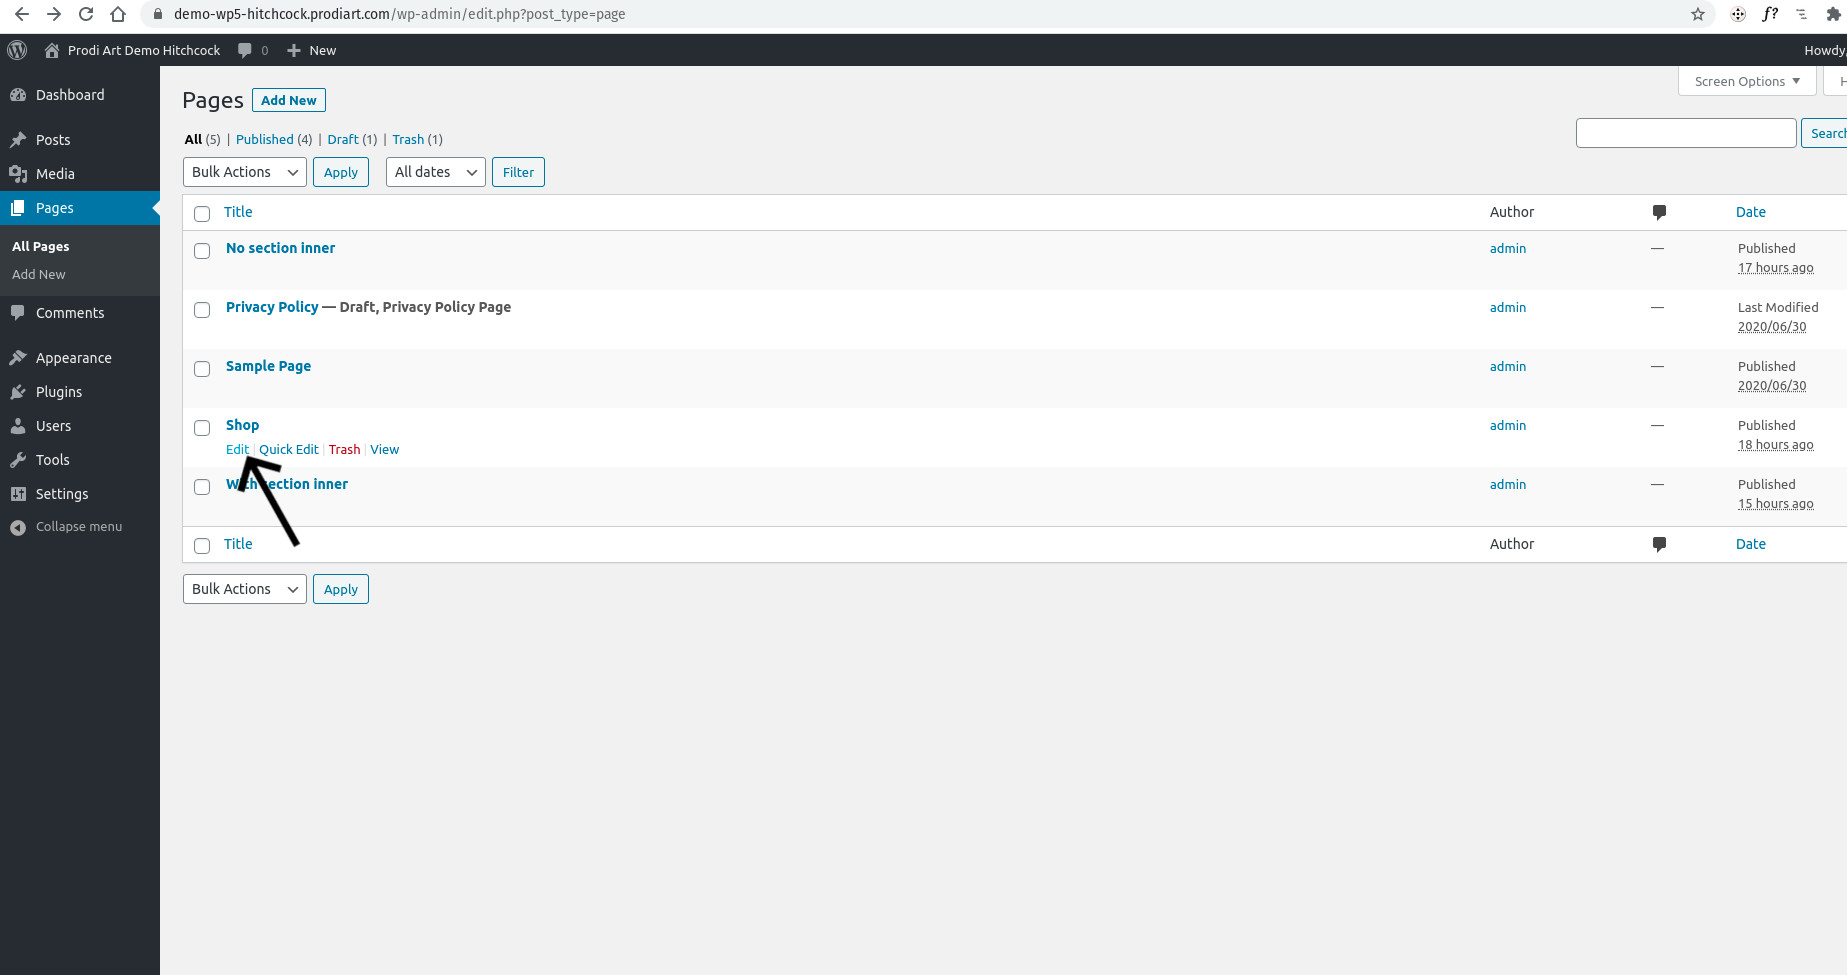
Before creating the CSS, you need to know the Id of your gallery page. This Id will be displayed in the URL where the page is edited:
The gallery must be inside a block of type <div>.../div> including a class like "section-gallery" to identify it, for example:
With this Id, CSS code for this page can be added with the Simple CSS extension.
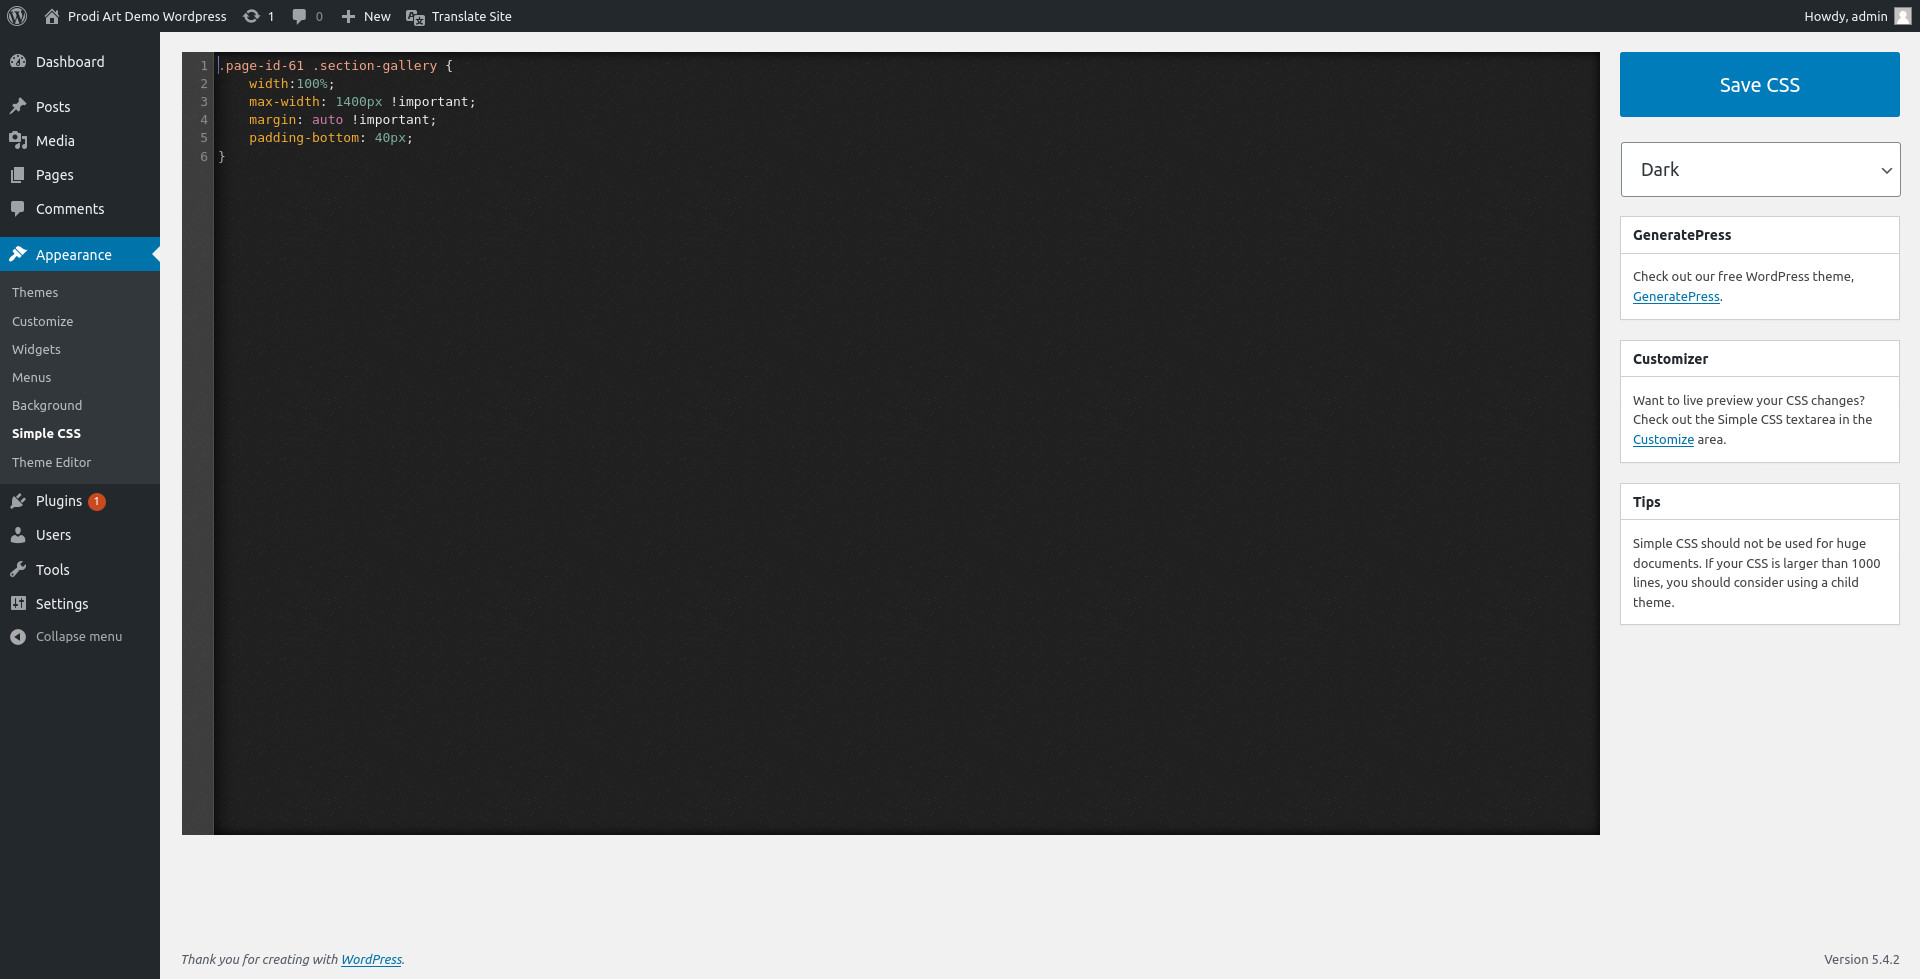
In this example, the Id of the page is 61 and the CSS code used to display the gallery in a block is:
Result with the default Wordpress theme: